Activity – PowerPoint 1: Presentation Tips
[This section should take you around 30 minutes to complete]
Follow the numbered steps below to complete this activity (PowerPoint Activity 1).
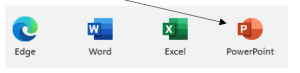
1. Click the Windows icon at the bottom of your screen.

2. Click PowerPoint to launch Microsoft PowerPoint.
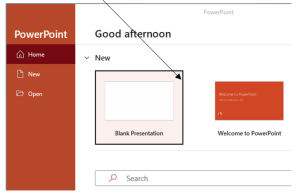
3. Click Blank Presentation to create a new presentation document.
4. Click in the box labelled Click to add title and type Presentation Tips
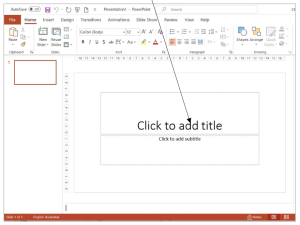
5. Click in the subtitle placeholder labelled Click to add subtitle and enter your name.
Adding a New Slide
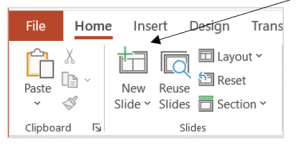
1. On the Home ribbon, click the New Slide icon.
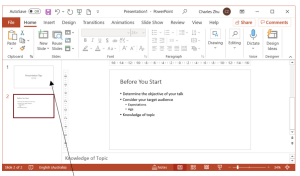
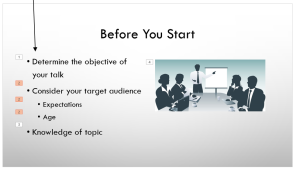
2. Click in the Click to add title placeholder and type Before You Start as the title of this slide.
3. Click in the Click to add text placeholder.
4. Type Determine the objective of your talk and press Enter key.
5. Type Consider your target audience and press Enter key.
Demoting and Promoting Bullets
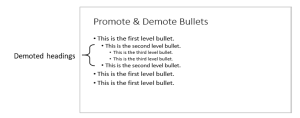
Demoting and promoting bullets are skills for creating multi-level bullets. This can be seen in the example shown below.
1. Press the Tab key OR click  to demote the bullet to a lower level.
2. Type Expectations and then press Enter key.
3. Type Age and then press Enter key.
4. Press the Shift and Tab keys together OR click  to go back a level.
5. Type Knowledge of topic.
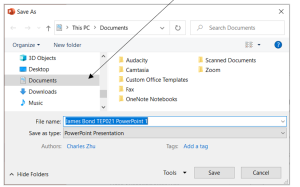
6. Click the File tab and select Save As to save the presentation as Your Name TEP021 PowerPoint 1 in the Documents folder on your computer.
Adding Notes
Below each slide, PowerPoint provides a section to store speaker notes, which will not be visible to audience, but can only be seen by the presenter in presenter view (you will learn about presenter’s view later). Now let’s first enter some speaker notes for this slide.
1. Click Notes at the bottom of the PowerPoint window to display the Notes section.

2. Click in the Click to add notes placeholder.
3. Type Knowledge of Topic and press Enter key.
4. Move the mouse pointer to the top edge line of the Notes section. When the mouse pointer changes to , hold the mouse button and drag upwards to enlarge the notes section.

5. Type the following text.
Knowing your material thoroughly will help you decide what information is essential to your presentation and what can be left out. It will help your presentation to flow naturally, allowing you to adjust to unexpected questions or events, and it will help you feel more comfortable when speaking in front of an audience.
6. Save your presentation and keep it open.
Adding Graphics to Your Slides
You can add a variety of graphics to your slides to enhance your presentation.
ClipArt / Online Pictures
Microsoft Office included an Online Pictures feature that searches for clipart and other types of online images directly, however, it is NOT recommended in academic writing because it does not provide sufficient information about the images for attribution and reference.
If you want to use Clip Art in your document, it is recommended that you search for clip art in Google and download it to your computer and then insert it into your document, and remember to provide attribution and reference.
Inserting a Picture Stored on Your Computer
You can add to your presentation an image captured with a digital camera, scanner or downloaded from the Internet. The picture should be saved as a separate file on your computer. This file may have an extension to its name such as JPG, JPEG, GIF, TIFF, PNG, etc.
1. Open your web browser and go to Google Images to search and download a few CC-licensed pictures about presentations.
2. Return to the PowerPoint presentation you have been working on.
3. Return to the first slide by clicking on the slide thumbnail
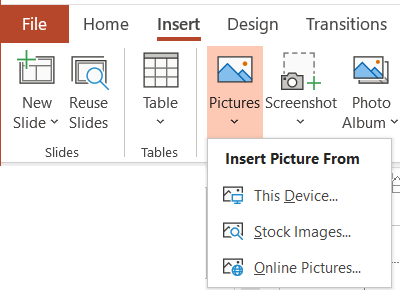
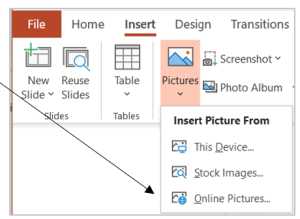
4. On the Insert ribbon, click Pictures and then This Device.
5. Navigate to the location where the image file was saved.
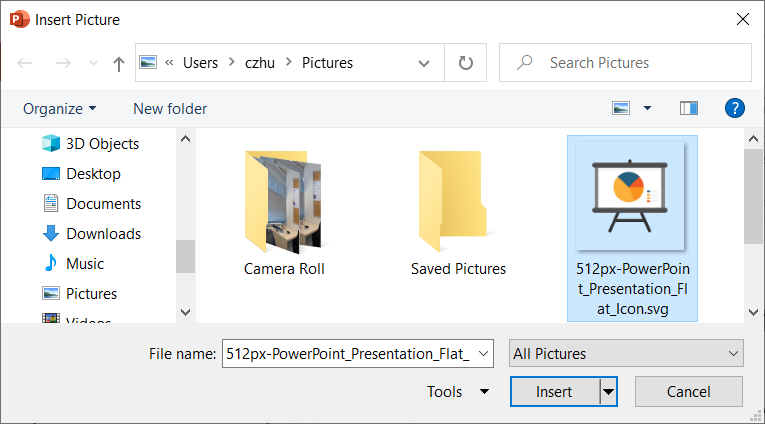
6. Select the image file and click Insert.
7. Resize and reposition the picture if required.
Inserting AutoShapes
You can create your own graphics with Shapes to enhance your presentation.
1. Working with the first slide, on the Insert ribbon, click Shapes.
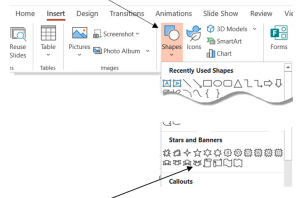
2. Click the Ribbon: Tilted Down in Stars and Banners section.
3. Move the mouse pointer, which is a cross now, onto the top left of the slide.
4. Click and hold down the left mouse button and drag across and down to get a banner as shown below.
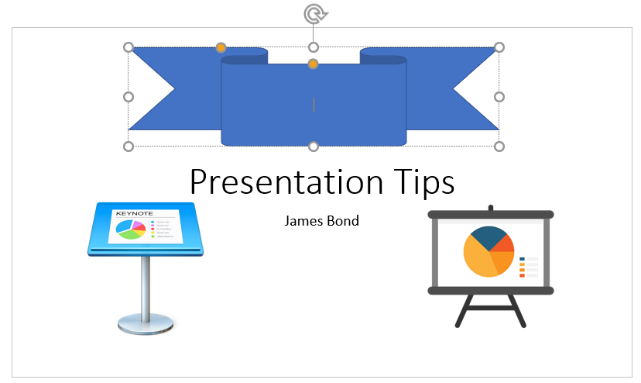
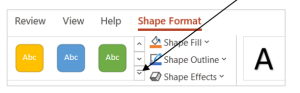
5. On Shape Format ribbon, click the More button of the Shape Styles group and select a Shape style of your choice. (The Shape Format will not show if the Autoshape is not selected.)
6. Right–click on the banner and select Edit Text.
7. Type Banner and adjust the size and colour of the font to fit the banner.
8. Save your presentation and keep it open.
Change the Layout of a slide
1. Click on the thumbnail of the second slide.

2. On the Home ribbon, click Layout.
3. Click on the Two Content layout.
4. Click the Pictures icon.
5. Insert a clipart of your choice.
6. Re-position and resize the clipart to fit your slide.
7. Save your presentation and keep it open.
Applying a Theme
You can give a colourful and professional background to your slides by applying a theme to your presentation.
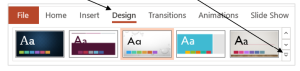
1. Click the Design tab and then click the More button for more themes.
The various themes appear. Hover the mouse cursor on each of the themes to preview their effects.
2. Choose a theme of your choice and click on it. This theme is applied to all slides in your presentation.
3. Try a few different themes and apply the one you like most to your presentation.
4. Save your presentation and keep it open.
Adopting Design Ideas
While you build your presentation slides, PowerPoint may give you some slide-layout suggestions on the right-hand side of the window, generated using the elements on the current slide. This is called Design Ideas. Design Ideas can help you quickly build slides with an artistic or professional look.
For the sake of a consistent style for all your slides, it is highly recommended to apply a theme to your presentation before adopting any design ideas.
To adopt a design idea, simply double-click on it.

Adding Special Effects
You can add special effects to your slides, text and pictures. Special effects include Transitions and Animations.
Slide Transitions
A slide transition makes the slide move from one slide to another on the screen in different ways. For example, a slide can move from the left to the right or emerge as a checkerboard.
1. On the Transitions tab, click on a transition scheme to preview its effect.
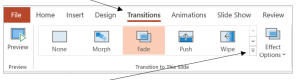
2. Click the More button for more transition schemes.
You can apply a different transition to each slide or the same transition to all slides in your presentation.
- To apply a different transition to each slide separately
a) click on a slide to select it, then
b) click a chosen transition.
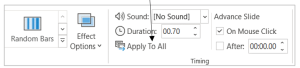
- To apply the same transition to all slides,
a) click on one of the slides, then
b) click your chosen transition,
C) click Apply to All to apply the same transition to all slides in your presentation.
3. Now, apply transitions of your choice to all slides in your presentation.
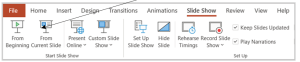
4. On the Slide Show tab, click From Beginning to preview the effects.
Press the ESC key to exit your Slide Show.
Save your file and keep it open.
Animations
Animation is the various effects added to your text, graphics, auto-shapes, tables or charts, such as the order, time, and motion path for each element to appear on the slide
1. Click the Animations tab.
2. Click on any text on your slide to show the dotted line box around the text.
3. Click the More button or the Add Animation icon for more animation effects and then click on an animation of your choice to apply it to the text on this slide.
4. Click the picture to select it and then apply an animation to it.
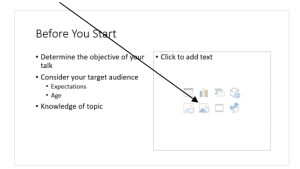
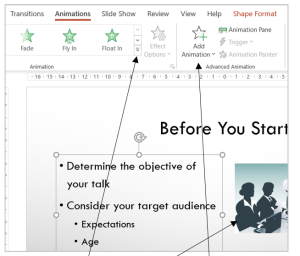
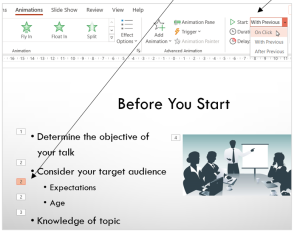
The numbers indicate the order that the text will appear on the slide. Each time the mouse is clicked, the text with the same number will appear.
Note that there are three dot-points labelled with the same number (2) in the above animation scheme. That means these three lines of text will appear on the slide as a block when you click the mouse in Presentation mode.
If you want each of the sub-level bullets (Expectations and Age) to appear separately, click the corresponding number to select it and then change With Previous to On Click.
5. Save your document.
Adjusting the Order of Animations
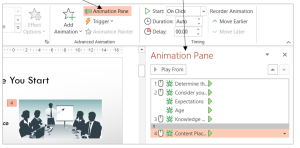
Note that the image is labelled with a number (4), which means it will be the fourth item in the sequence, and it is the last one on this slide, to appear. What’s the point of showing an image after you have finished your talk? The image should appear with the relevant text. So you need to change the order of the animations.
Now let’s set the image to appear with the text “Determine the objective of your talk”.
1. Click Animation Pane to display the Animation Pane.
2. Click the number next to the image (which is 4 in the screenshot above) or the same number in the Animation Pane to select it.
3. Click the Move Up button to move it just below “Determine the objective of your talk”. The number for the image becomes 2.
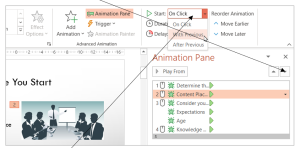
4. Click the Start option and select With Previous to make the image appear at the same time with the text “Determine the objective of your talk”.
5. Save your document.
Electronic Slide Show
To play your presentation slides,
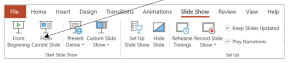
1. On the Slide Show ribbon, click From Beginning.
2. Click the mouse anywhere on the slide OR press the Space Bar to advance to the next bullet/slide.
3. Press the Esc key to exit the presentation mode when you come to the end of the last slide.
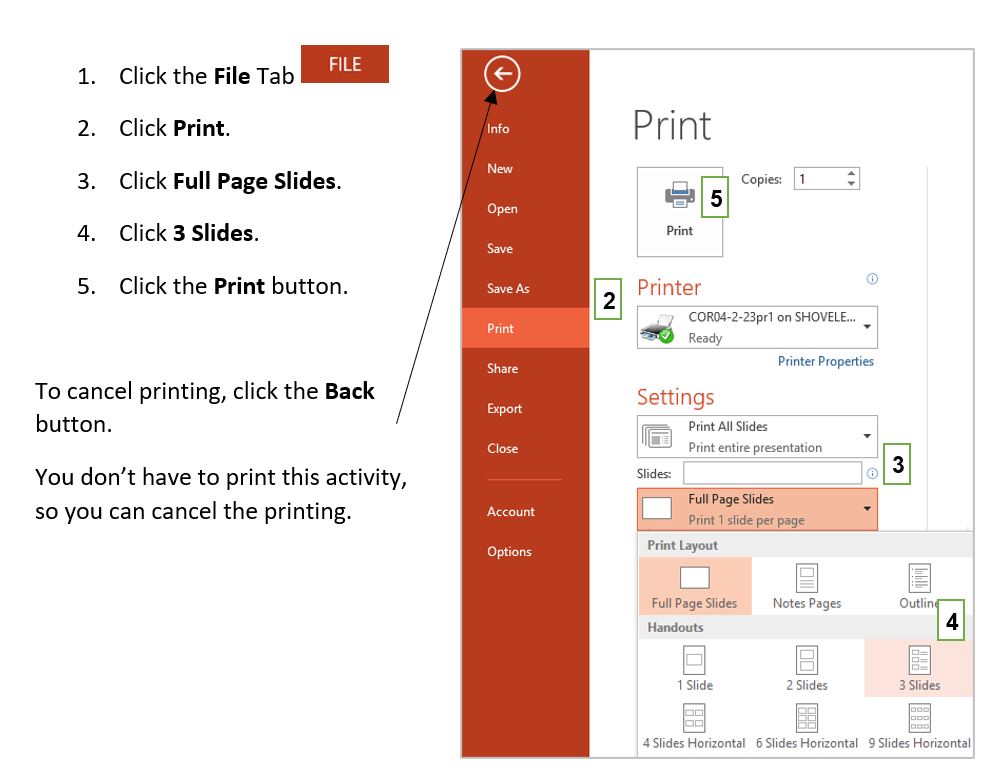
Printing a Presentation
PowerPoint does more than just print out your slides. It allows you to print out your speaker notes, slide handouts and an outline of the presentation.