
Activity – Word 1: Basic formatting
[This section should take you around 7 minutes to complete]
In this activity you will:
- Change the ruler tool to centimetres
- Revise inserting header and footer
- Customise margins
- Insert bullets and numbering
- Sort paragraphs and lists
- Customise indents
Good formatting depends upon good document layout. Document layout is concerned with the overall design, or how the various parts or elements of the document are arranged.
As with overall formatting, a good layout supports easier reading and review, while poor layout hampers both.
Let’s begin our exploration of document formatting and layout by first setting the correct unit measurement.
Changing the Measurement Unit of Microsoft Word
The measurement unit of Microsoft Word is set to inches by default. To complete the activities and assignments in this unit to the required standards, you must set the measurement unit of your Microsoft Word to centimetres. What follows comprises the first skill practice task for this topic.
- Start a new Word document.
2. Click the File tab and select Save As to save it as YourName StudentNumber TEP021 Word 1 into your OneDrive folder.
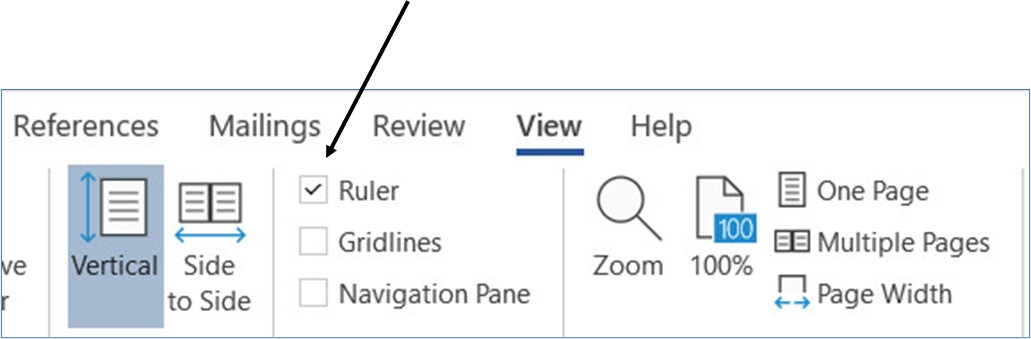
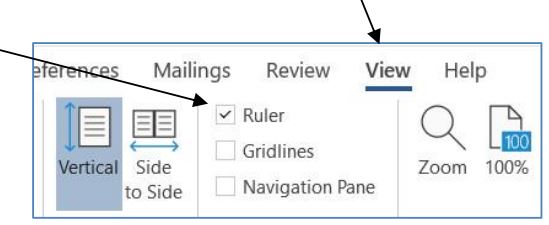
3. Click the View tab and make sure the box for Ruler is checked.
4. Click the File tab, then Options.
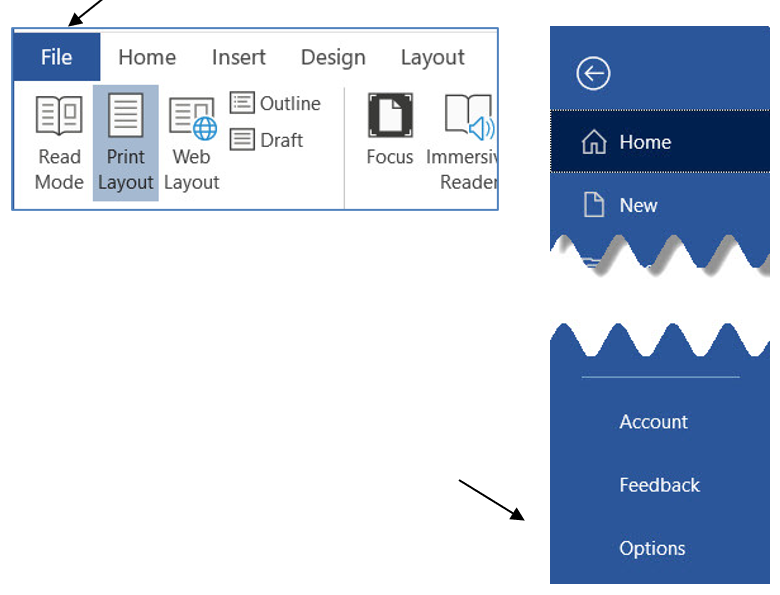
5. Click Advanced, and then scroll to Display section by dragging the scroll bar down.
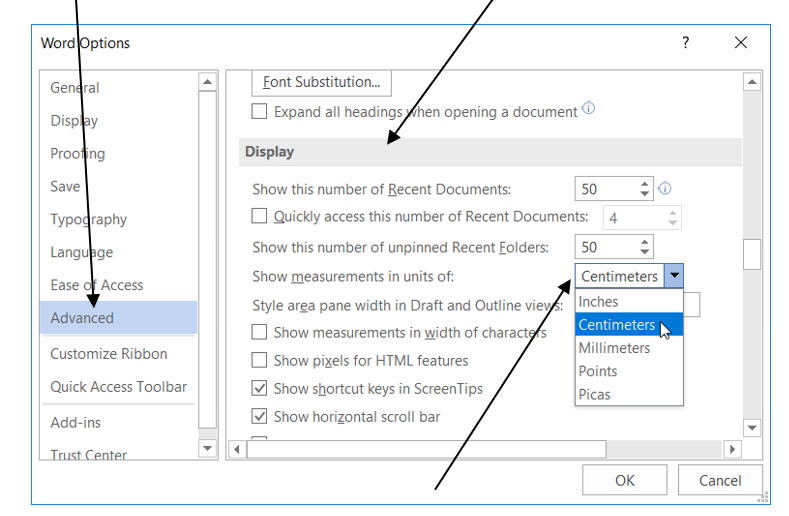
6. Click the drop-down arrow and select Centimetres.
7. Click OK.
8. The measurement unit is set to centimetres and the ruler should look like this:

Now, let’s enter some text into the document.
- Type or copy the following text:
Word Layout (as a working title)
Margins
There are several reasons you might want to adjust the margins in a document:
To improve readability: Large left and right margins create a narrower area for text. Generally, it is easier to read a short line of text than a long one.
To change the length of a document: Smaller margins leave more room on each page for text and can reduce the number of pages in a long document.
To allow room for binding: Depending on the binding method you use, a portion of the margin may be hidden by the binding. You may want to increase the margin width to compensate.
2. Add a header with your name and student number on the left, and date on the right (See Topic Two or– Revision: Header and Footer below).
3. Add a footer with the filename on the left, and a page number (page x of y) on the right (see Week Two – Activity – Goals and Motivation 3: Recording your goals in a Word table or Header and Footer below).
4. Save your document and keep it open.
Note: Mac Users: Go to Microsoft Word menu > Preferences, under authoring and proofing tools, select General, and then choose the unit of measurement you want. Then click OK.
Revision: Inserting a Header and Footer
Do you recall working with headers and footers in Topic Two? Let’s quickly revise this information here, as you will being using headers and footers more frequently below.
- On the Insert ribbon, click Header and then select Edit Header.

2. Type your name and Student Number in the Header and then press the Tab key once to move the insertion point to the middle of the header section.
You can go further, and also insert the date and time in the head/footer and apply formatting to these.
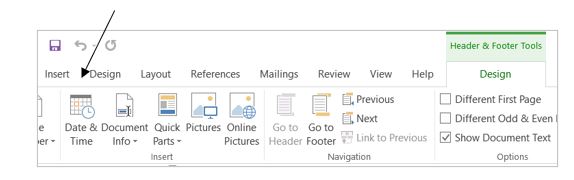
3. Click Date & Time
4. Select the desired format for date and click OK.
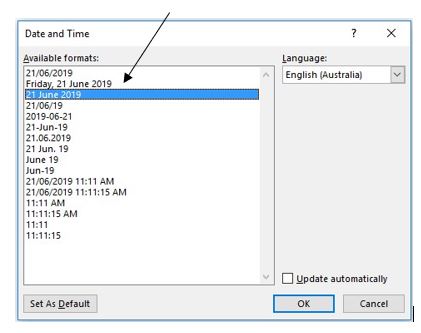
5. Press the Tab key once to move the insertion point to the right of the header section.
6. Click the Date & Time icon again.
7. Select a desired format for time, e.g., 11:00 AM, and click OK.
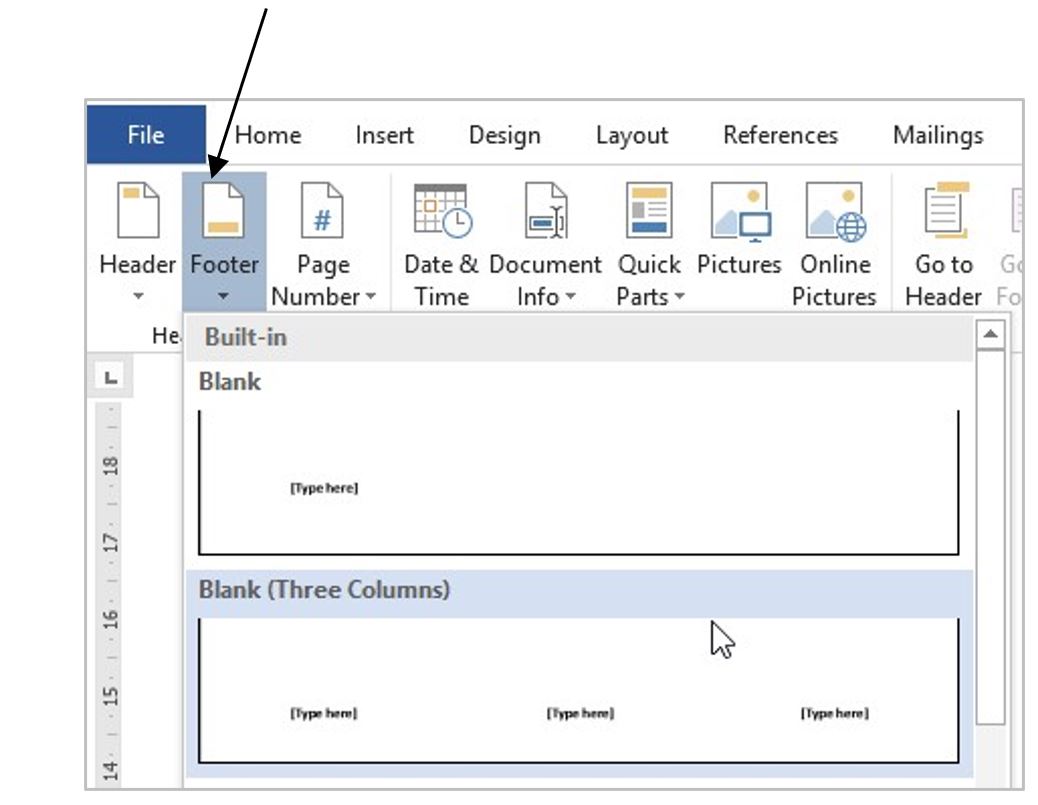
8. Click the Footer icon and select Blank (Three Columns).
9. Click on the first [Type here] box to select it.
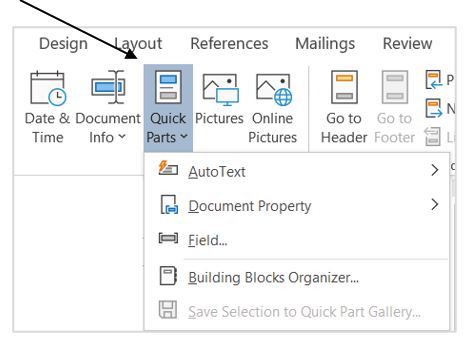
10. Click Quick Parts, then Field….
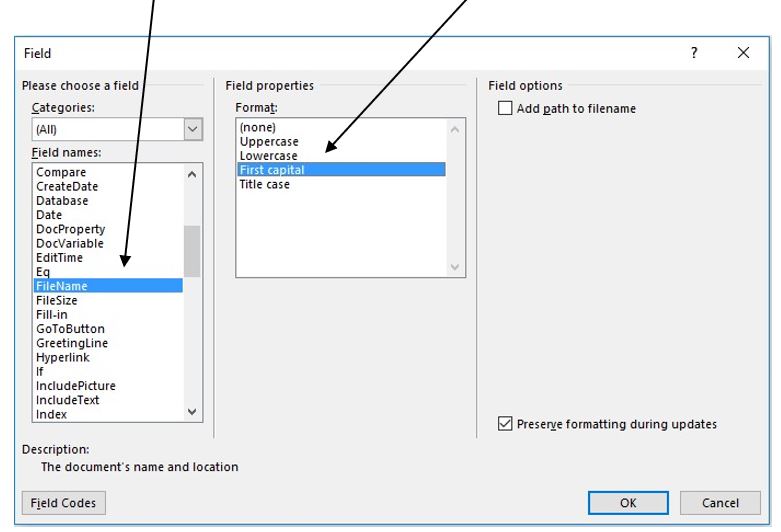
11. Select FileName from the Field names and First capital from the Format, and then click OK.
12. Click the [Type here] in the middle and press the Delete key.
13. Click the [Type here] on the right to select it.
14. Click on the Page Number icon, then on Current Position.
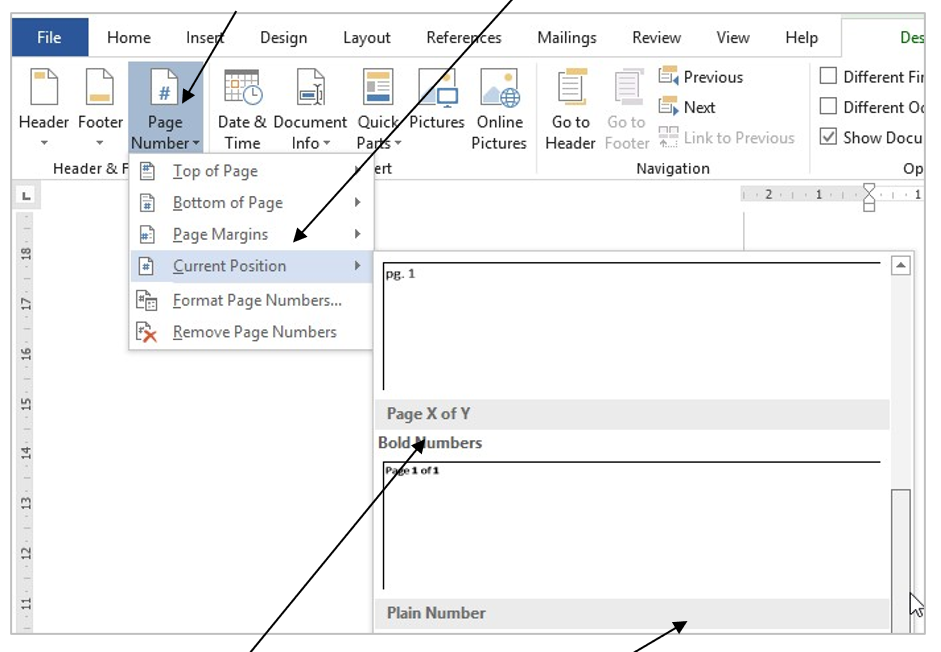
15. Select Page X of Y Bold Numbers. You may need to use the scroll bar to locate it.
16. Double-click in the main document area to exit footer.
Margins
Margins are the spaces from the edge of the text to the edge of the paper. They control how much space you want to have around the main content of a page. You can assign the same or different values for each of the four sides: top, bottom, left and right. Working with your already open document (YourName StudentNumber TEP021 Word 1):
- Click the Layout tab, then Margins.
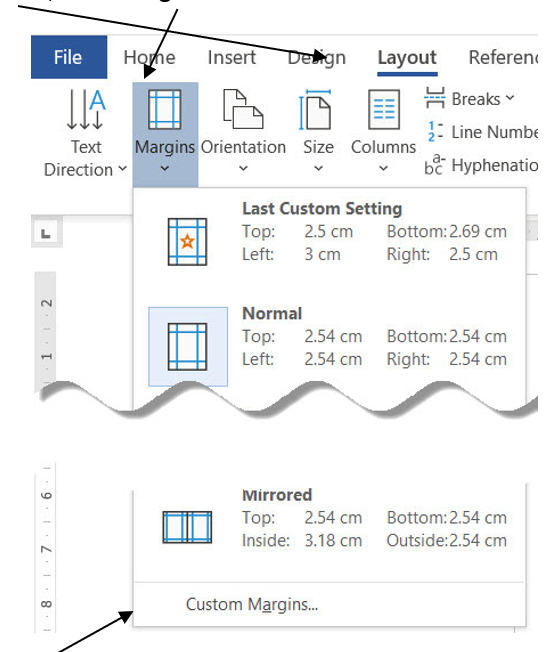
2. Click Custom Margins…
3. The Page Setup box showing the default values for the margins will be displayed.
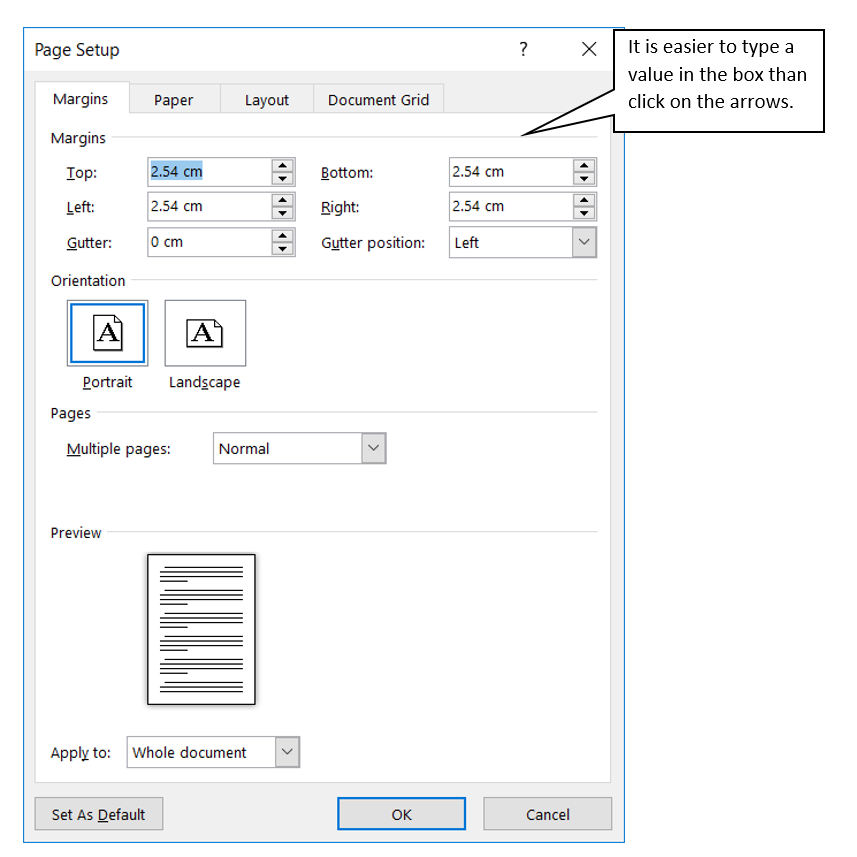
4. Click inside the Top margin box.
5. Type 4 cm in the box.
6. Click in the Bottom margin box and change this to 4 cm.
7. Click in the Left margin box and change this to 3 cm, do the same with the Right margin box.
8. Click OK to see the difference and keep the document open.
Bullets and Numbering
Bullets and Numbering allow you to put any text paragraph into either a bulleted list (using bullet points) or a numbered list (using numbers), quickly and easily.

- Select the last three paragraphs in your currently open working document (YourName StudentNumber TEP021 Word 1).
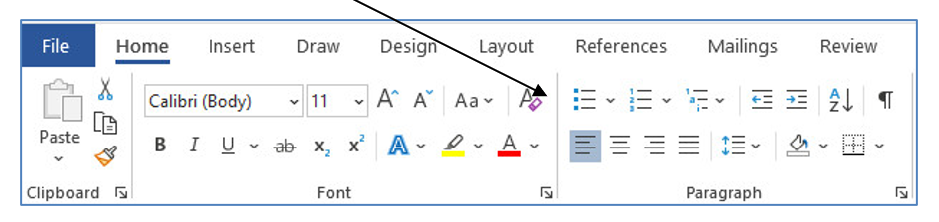
- On the Home tab, click the Numbering icon in the Paragraph group box.
3. Save your document and keep it open.
Sort paragraphs and lists
Sometimes you may want to put a list or a few paragraphs into alphabetical order. For example, when you write an assignment, you will be required to provide a reference list at the end of your assignment which must be in alphabetical order. This can be easily achieved by using the Sort function in Microsoft Word. Working with your open document (YourName StudentNumber TEP021 Word 1):
- Highlight the last three paragraphs – the numbered list.
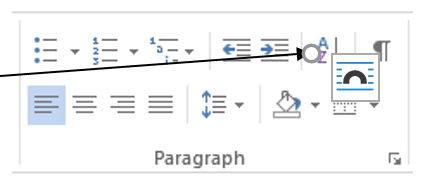
2. Click the Sort icon in the Paragraph group box.
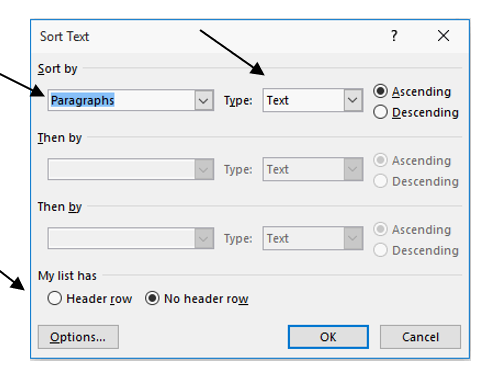
3. Make sure that Paragraphs, Ascending and No header row are selected.
4. Click OK.
5. Save your work so far on your OneDrive folder.
Note that the paragraphs are re-ordered and the numbers are re-adjusted.
Indents
Indents allow you to push all or part of a paragraph inward from the margin for emphasising text. There are four main types of indents. In Topic Five you used a hanging indent to format a reference list. Introduced here, is a more advanced indent skill, as there are different ways to do this. The first way will be to use indent markers.
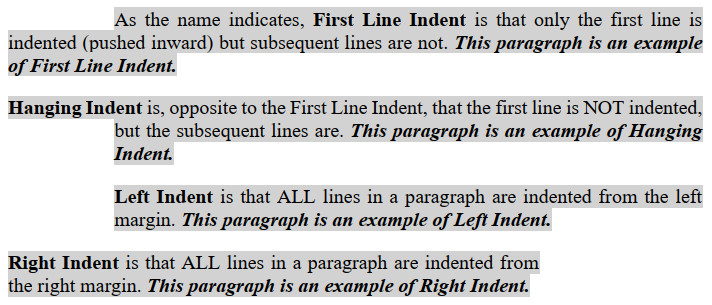
Pay special attention to the shapes of the shaded paragraphs while you read them.
Indents are controlled by the indent markers on the ruler bar, which is immediately below the ribbon.

Note: if you do not see the ruler bar, click the View tab and then tick the box for Ruler
Now, let’s continue working on this document with some extra random text and learn to apply each type of indents to paragraphs.
- Type Word Indents Location as a working title under the work already produced and press the Enter key.
- Type “ ═rand(8) ” without quotation marks and then press Enter to generate 8 paragraphs of text.
- Click the File tab and select Save As to save the document as YourName StudentNumber TEP021 Word 1 in the Documents folder on your computer.
- Set the left and right margins to 2.5 cm and Top and Bottom margins to 3 cm.
- Select the first paragraph and click and hold the Left Indent marker and drag it along the ruler until it reaches 2 cm and let go.
- Select the second paragraph and click and hold the First Line Indent marker and drag it along the ruler until it reaches 2 cm.
- Select the third paragraph and click and hold the Hanging Indent marker and drag it along the ruler until it reaches 2 cm.
- Select the fourth paragraph and click and hold the Right Indent marker and drag it along the ruler until it reaches 10 cm.
- Apply Justify alignment to all paragraphs.
- Save your document.